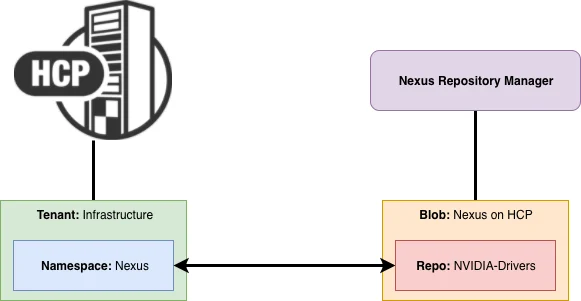
Nexus Repository Manager by Sonatype is an all-in-one solution for hosting local repositories in formats such as Docker, PyPI, Yum, Apt, and Maven. In Nexus 3.12, S3 support was added to blob storage. This article shows how to pair Nexus with Hitachi Content Platform.
Disclosure: I work for Hitachi Vantara, the creator of Hitachi Content Platform.
Minimum requirements
- Hitachi Content Platform 8.0 or newer (8.1.2.4 was used here)
- Nexus Repository Manager 3.12 or newer (3.15.2-01 was used here)
Configuring HCP
Create a tenant and namespace
Create or open the HCP tenant, enable versioning, and assign the required roles to the administrative user. Create a namespace named Nexus, set its quota, enable Cloud Optimized and Versioning, and set version pruning to one day.
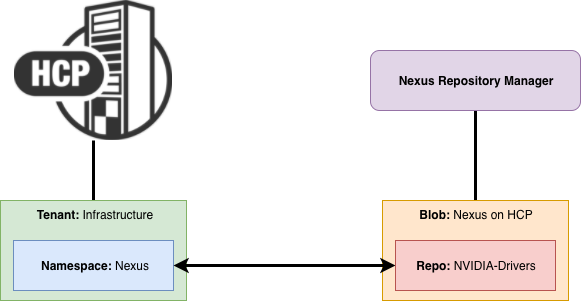
Enable ACLs for the namespace. Under Protocols, enable the Hitachi API for Amazon S3. Then create a service account for Nexus, grant it access to the namespace, and save the authorization token.
Configuring Nexus
In the Nexus admin panel, open Blob Stores and create an S3 blob store with the following values:
type: S3
name: Nexus on HCP
bucket: nexus
access_key_id: <first part of the HCP auth token>
secret_access_key: <second part of the HCP auth token>
region: us-east-1
endpoint_url: http://infrastructure.example.com
expiration_days: -1
signature_version: S3SignerType
path_style_access: true
After creating the blob store, create a raw hosted repository and select the HCP-backed store. Upload a test file from Nexus, verify that it appears in the repository, and then confirm that the object is present in the HCP namespace.
Pairing a repository manager with object storage keeps artifact management in Nexus while HCP provides the storage layer behind it.